
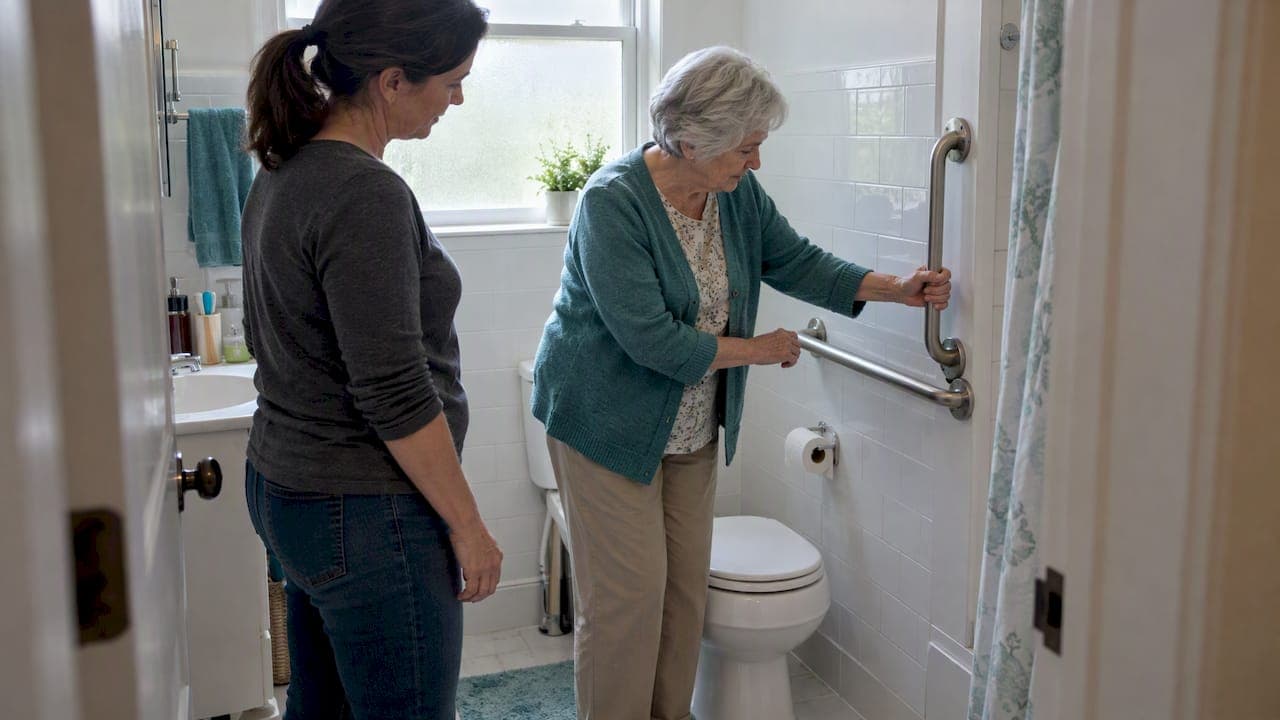
Start with a vertical grab bar at the shower entry and a side or rear bar at the toilet, and always mount them into studs or reinforced blocking, never suction cups. The Access Board puts the top of a horizontal grip at 33–36 inches above the floor, and the CDC recommends bars both inside and outside the tub or shower and next to the toilet.
TL;DR:
- For a tub shower, mount an 18 to 24 inch vertical entry bar 4 to 6 inches from the opening, then add an interior bar.
- At the toilet, a side bar supports lowering and a rear bar helps standing; reference lengths are at least 42 inches and 36 inches, respectively.
- Set horizontal grip tops 33 to 36 inches above the floor, and ask a professional if the person's reach falls outside that range.
- Call a contractor for tile over plaster, missing studs, or uncertain fasteners; an occupational therapist can assess complicated transfers and bathroom hazards.
Table of Contents
- Where should grab bars go in a shower or tub?
- How do you place grab bars next to the toilet?
- What height should a grab bar be?
- How do you find studs and install a grab bar safely?
- What types of grab bars work best?
- What mistakes should you avoid with grab bars?
- What I'd tell a friend about grab bars and professional help
- How we can help you take the next step
- FAQ
- Sources
Where should grab bars go in a shower or tub?
The most important bar is the one at the entry. Most slips happen during the transfer, the moment a foot lifts over the edge and weight shifts from dry floor to wet surface. Angi's consumer guidance agrees: start with two bars for basic needs, and the entry bar comes first.
Here is how the placements usually break down:
- Entry wall, vertical bar: Mount it 4–6 inches from the opening, with a length of 18–24 inches so a hand can find it at several heights as your parent steps in.
- Side wall, horizontal bar: A bar of 24–36 inches or longer gives support for sitting down on a shower seat or standing back up.
- Side wall, diagonal bar: Some people find an angled bar easier on the hand joints and smoother for moving between sitting and standing.
- Back or front wall: These bars steady your parent while turning, reaching the controls or washing. Add one when balance is a worry, building the setup around your parent's needs.
Your shower type changes the picture. A walk-in shower with no curb may need the entry bar more for balance than for stepping over. A tub-shower combo with a high edge benefits from a bar on the wall where your parent steps over, plus one inside. A transfer shower, where someone slides from a wheelchair onto a seat, usually needs longer side-wall bars. A small stall may only have room for a vertical bar and one horizontal bar, and that is a perfectly good start.
Pro Tip: Have your parent stand where they would step in and reach out naturally. Tape a strip of painter's tape where their hand lands. That spot, not a measurement from a chart, is your starting mark.

Falls are a bigger concern than most families realize; for seniors, consulting experts on how podiatry helps seniors stay mobile can support foot health to reduce fall risks. The CDC reports that 1 in 4 adults age 65 and older falls each year, and bathrooms are a common place for it to happen. If you want a broader view of the rest of the house, our guide to making home safer for an elderly parent walks through the other rooms.
How do you place grab bars next to the toilet?
For the toilet, think in two walls. A bar on the side wall gives your parent something to push down on while lowering, and a bar on the rear wall gives them a place to pull from when standing. When both are possible, both are worth having, because they support different parts of the movement.
The Access Board's plumbing guidance gives reference dimensions for water-closet setups: a side-wall bar at least 42 inches long and a rear-wall bar at least 36 inches long. Even if you are not building to a commercial code, these numbers are useful. They tell you how much wall to reinforce so you have options later. The same guidance lists a 1.5 inch space between the wall and the bar.
A few practical points help in real bathrooms:
- Flush controls: If the flush handle sits on the wall side, you may need to shift the rear bar off center so a hand does not bump the handle. Keep the bar long enough to still be useful.
- Tight spaces: In a small powder room, a side-wall bar alone is far better than none. Start there and add the rear bar if space allows.
- Reinforcement first: If you are not ready to install a rear bar, add blocking behind the wall now. The Access Board's ABA guidance notes that reinforcement in residential units exists so compliant bars can be added later.
- Reach check: Sit on the toilet and reach out. If your parent cannot grip the bar without leaning, it is too far away.
What height should a grab bar be?
Standards give a clear range, and the useful part is knowing how to adapt it to the person. For horizontal bars, the Access Board places the top of the gripping surface at 33–36 inches above the finished floor. Where a standard gives a range like this, the range itself is the requirement, not a loose suggestion. Bathtub-specific guidance can differ, and vertical bars follow their own ranges, so check the section that matches your setup.
Grab bars and their fastenings must withstand a vertical or horizontal force of 250 pounds at any point, according to the Access Board's bathing-room guidance. That is the number to keep in mind when choosing fasteners and deciding where to anchor.
A few other details matter as much as height:
- Wall gap: Leave 1.5 inches between the wall and the bar. Too wide and an arm can slip through. Too narrow and fingers cannot wrap around.
- Clearance above objects: Keep clear space above anything that projects below the bar, such as a shelf or soap ledge, so a hand has room to travel.
- Structure: The bar, the screws and the wall behind them all count. A strong bar on a weak wall fails at the wall.
To fit the height to your parent, skip the chart for a moment. Ask them to stand relaxed with an arm bent at the elbow, and note where the hand naturally falls. Measure from the floor to that point. If it lands in the 33–36 inch band, use it. If your parent is shorter or taller, or uses a seat, ask a professional to help decide on a safe placement rather than going outside the specified range. Mark the spot with tape, then have them reach for it before you drill anything.
How do you find studs and install a grab bar safely?
A grab bar is only as strong as what holds it. Bars must go into solid wall studs or reinforced blocking. Installing into hollow wall material without support can fail under the force of a fall, and a tile surround on its own will not hold a person's weight. Towel racks fail for the same reason: they were never designed to carry a body.
If you do not have a stud where you need one, you have two realistic options. You can open the wall and add wood blocking between studs, then close it up before the bar goes on. Or you can use heavy-duty anchors that the bar's manufacturer specifically approves for that wall type. Both work only when the manufacturer's instructions are followed exactly, and anchors in particular are less forgiving than a stud.
Here is a short checklist for a stud-mounted bar:
- Measure from the floor and from a corner to your taped mark, and note the measurements.
- Locate the studs with a stud finder, then confirm by tapping or checking the edges of the finder's range.
- Mark and level the mounting holes with a pencil and a small level, so the bar sits straight.
- Drill pilot holes at the right size for your fasteners, going slowly through tile to avoid cracking.
- Fasten the bar using the screws supplied, seal around the holes if the manufacturer advises, and tighten until snug.
- Test it by pulling down firmly with your own body weight before anyone relies on it.
Pro Tip: Take a photo of the wall and the stud marks before you cover anything. If you ever need to add a bar later, that picture saves you from guessing.
Call a contractor if the wall is tile over plaster, if you cannot find a stud, or if you are unsure about a fastener. If your parent has a complicated transfer, the CDC suggests an occupational therapist for a home safety evaluation, and the STEADI pocket guide recommends referral when hazards or falls are identified. Our elderly home safety checklist also helps you audit the bathroom before you start.
What types of grab bars work best?
The right shape depends on the movement you are supporting.
- Horizontal bars: Best for steadying yourself while moving along a wall, and for pushing up from a seated position, such as at a shower seat or toilet.
- Vertical bars: Best for stepping in and out, since a hand can slide up or down to find the right grip. This is why the entry bar is usually vertical.
- Diagonal bars: Helpful for people who find a straight horizontal or vertical grip hard on the wrists, and for the sit-to-stand motion.
- Stanchions: Floor-to-ceiling or floor-mounted posts help in spaces where a wall cannot take a bar, though they need professional planning.
Pay attention to the grip itself. A bar with a diameter between 1¼ and 2 inches fits most hands, and it should not spin in its mounts. Keep the 1.5 inch wall gap we covered earlier.
Skip suction-cup bars for primary support. They are fine as a temporary reminder for guests, but permanent, screw-mounted bars anchored into studs are the standard for long-term safety. For a deeper look at styles and finishes, see our guide to the best bathroom grab bars for elderly parents.
What mistakes should you avoid with grab bars?
Most problems come from shortcuts that look fine until someone leans on them. These quick rules catch the common ones:
- Don't count towel bars or soap dishes as support. They are decorative and will pull away from the wall.
- Don't rely on suction for anything your parent will put weight on.
- Confirm the anchor: If you cannot say whether a bar is in a stud or blocking, assume it is not and check.
- Match the bars: When you add more than one, keep heights and clearances consistent so your parent's hands learn the pattern.
- Check the wall gap and the clearance above any shelf or ledge.
- Inspect the screws regularly. Tighten any that have loosened, and look for rust or movement.
Before anyone depends on a new bar, apply your own body weight in a slow, firm pull. If anything shifts, even slightly, stop and fix it.
Pro Tip: Put a reminder on your phone to check each bar regularly. Steam and daily use can loosen fasteners gradually, and you may not notice until it matters.
If you want help tracking this alongside the rest of the house, our aging in place and home safety guide covers the next steps.
What I'd tell a friend about grab bars and professional help
Adding visible bars to a parent's bathroom can feel like announcing that something has changed. Many families worry about how it looks, and many parents worry about what it means. In my view, a well-placed bar is the opposite of a surrender. It is the thing that lets someone keep showering on their own, which protects dignity far better than a fall does.
Bring in a professional when there has been a fall, when transfers are complicated, or when you cannot tell how your parent actually moves. A calm walkthrough with someone who has seen many bathrooms can sort the fixes by priority, so you do not try to do everything in one weekend. You do not have to figure this out alone.
— Mike C.
How we can help you take the next step
If you would like a second set of eyes on your parent's bathroom, we offer a few ways to get one:
- In-Home Age-Safe Home Safety Assessments: An on-site visit for local families, where we check reinforcement needs and how your parent actually moves through the space.
- Virtual Home Safety Consultations: A remote walkthrough where we guide you through measuring and planning bar placement from wherever you are.
- Caregiving Clarity Session: A focused conversation, $97 one-off, to sort priorities and leave with a simple action plan.
A session can help you think through your next steps. Book whichever fits, or start with the clarity session if you are not sure where to begin.
FAQ
Should grab bars be angled or straight?
Both are acceptable, and the choice depends on the person. Straight horizontal and vertical bars are the most common. An angled bar can feel more comfortable on the hands and help with sit-to-stand movement for some users.
What are two requirements when installing grab rails in a bathroom?
Mount them into studs or reinforced blocking, and leave a clear space between the wall and the bar. The Access Board also states that the bar, fasteners and supporting structure must withstand 250 pounds of force.
What is a good height for a grab bar?
For horizontal bars, the top of the gripping surface should sit at 33–36 inches above the floor, according to the Access Board. Choose a position within that range that fits your parent's reach, and test before drilling.
What type of grab bar is best for seniors?
A permanent, screw-mounted bar anchored into studs, with a grip diameter that fits the hand comfortably, is the safest choice. Pick the shape by the movement: vertical for stepping in, horizontal for steadying and seated transfers, diagonal when wrists or joints need a gentler angle.
Sources
- Cdc
- Chapter 6: Plumbing Elements and Facilities
- Shower Grab Bar Placement Guide: Know Where They Should Go | Angi