

If your parent has started using a cane or walker, the most important thing you can do right now is check three things: the handle height, the rubber tips, and the path they walk most often. Walker and cane safety comes down to fit, technique, and a few minutes of attention each week.
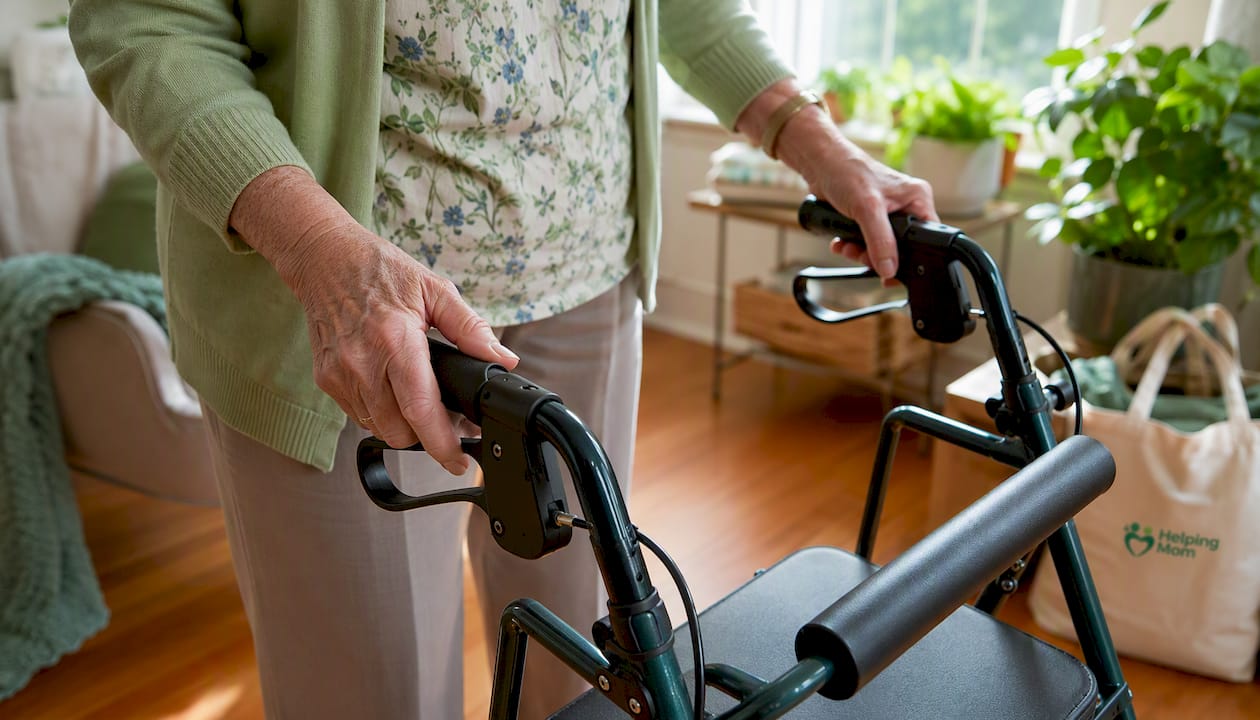
The short answer on which is safer: walkers offer more stability and are the better choice when your parent has significant balance problems, weakness in both legs, or a history of falls. A cane is appropriate for mild balance issues or single-leg weakness, where your parent still has good overall strength and coordination. According to the Cleveland Clinic, canes support roughly 25% of body weight, while walkers can support considerably more depending on design.
Three things to do today:
- Measure the handle height. Have your parent stand in their usual shoes with arms relaxed. The handle should line up with the crease of their wrist.
- Check the rubber tips. Flip the cane or walker over. If the tips are worn flat, cracked, or smooth, replace them before the next use.
- Walk with them once. A short, supervised walk of a few minutes tells you more than any checklist. Watch for leaning, hesitation, or shuffling.
Pro Tip: If your parent uses a rollator (a wheeled walker with a seat), make sure they know to lock the brakes before sitting down. Skipping that step is one of the most common causes of rollator-related falls.
Table of Contents
- What type of cane or walker does your parent actually need?
- How do you measure and set the right height?
- How should your parent actually walk with a cane or walker?
- Stairs, curbs, and uneven ground: the higher-risk moments
- Device checks that prevent the most common failures
- When should you replace tips, grips, or the whole device?
- Which home changes make the biggest difference?
- Buy vs. rent, price ranges, and what Medicare may cover
- When should you stop troubleshooting and call a PT or OT?
- Your caregiver checklist: daily, weekly, and on-visit steps
- Key Takeaways
- Small wins matter more than you think
- How Helping-mom supports you through this
- Useful sources
- FAQ
What type of cane or walker does your parent actually need?
Choosing the right device matters as much as using it correctly. The wrong aid for the wrong situation creates new risks.
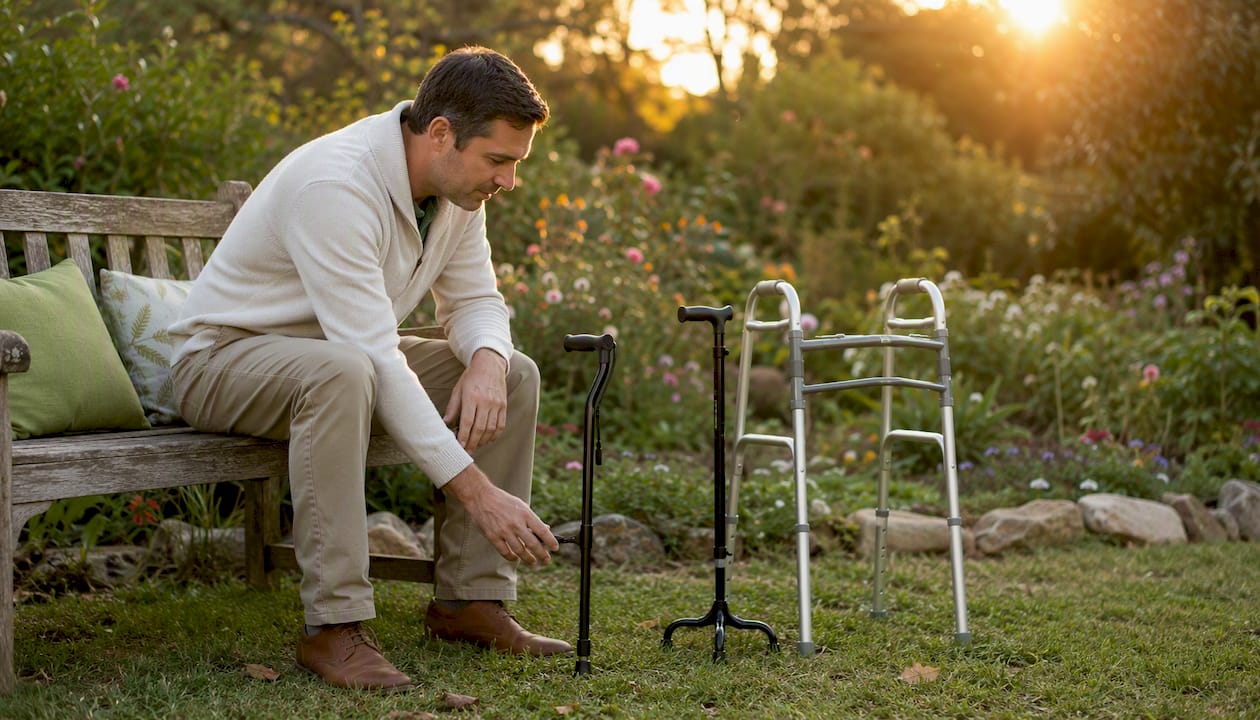
Single-point cane works well for mild balance problems or pain in one leg or hip. It's light, easy to carry, and fits most environments. The trade-off is a smaller base of support.
Quad cane has four small feet at the base, which gives more stability on one side. It's a good step up from a single-point cane when your parent needs a wider base but doesn't yet need a full walker. The gait is slower, and the cane must be placed flat to work correctly.
Standard walker (no wheels) offers the most stability of any walking aid. Your parent lifts it forward, sets it down, and steps into it. It requires upper-body strength and the ability to lift the frame, but it gives a very secure base. This is often the right choice after surgery or a significant fall.
Two-wheel walker has wheels on the front legs and rubber tips on the back. It glides forward more easily than a standard walker, which helps people who struggle to lift. It still requires some upper-body control.
Rollator is a four-wheeled walker with hand brakes and a built-in seat. It's well suited for people who tire easily or need to stop and rest. The seat is genuinely useful, but rollators require brake training and regular brake checks. The seat changes the center of gravity, so unsupervised use before practice is a real risk.
When your parent needs a walker rather than a cane: weight-bearing limits after surgery, weakness in both legs, poor posture control, or two or more falls in the past year all point toward a walker. A cane is appropriate when the issue is primarily one-sided and your parent has solid core strength and coordination.
Pro Tip: For a broader look at assistive devices beyond canes and walkers, the guide to assistive devices for elderly parents on Helping-mom covers grab bars, shower chairs, and more.
How do you measure and set the right height?
An incorrectly sized device is almost as risky as no device at all. Too tall and your parent leans forward; too short and they hunch. The Mayo Clinic recommends a handle height that aligns with the wrist crease and produces a 15–20° bend at the elbow when gripping the handle.
Sizing steps you can follow during a visit:
- Have your parent put on the shoes they wear most often at home.
- Ask them to stand up straight with arms hanging naturally at their sides.
- Measure from the floor to the crease of their wrist (the line where the wrist meets the hand).
- Set the device handle to that measurement.
- Have them grip the handle and check the elbow bend. It should look like a slight, relaxed bend, not a straight arm and not a deep bend.
That 15–20° angle matters because it lets the arm absorb some of the load during each step. A straight arm transfers all the force directly into the shoulder joint. A deeply bent arm puts strain on the wrist and reduces control.
For walkers, check both sides. Uneven handle heights cause leaning, which shifts weight incorrectly and increases fall risk. For quad canes, confirm the handle orientation matches the direction of the four-foot base.
Pro Tip: Most adjustable canes and walkers use push-button or pin-lock systems. After setting the height, give the device a firm downward push to confirm the lock is fully engaged before your parent takes a step.
How should your parent actually walk with a cane or walker?
Knowing the right movement pattern is where most people go wrong, and it's where you as a caregiver can make the biggest difference with just a few coaching sessions.
Using a cane correctly
The Cleveland Clinic is clear on this: hold the cane on the stronger side, opposite the weak or injured leg. The cane and the weaker leg move forward together, which mirrors the natural arm-swing pattern of walking and distributes load away from the injured side.
The gait sequence:
- Move the cane forward about one step's length.
- Step forward with the weaker leg, keeping it in line with the cane.
- Bring the stronger leg through to meet or pass the weaker leg.
A common mistake is holding the cane on the same side as the weak leg. It feels intuitive but actually reduces support and increases strain on the injured side.
One more rule worth repeating: never use the cane or walker to push up from a chair or lower down into one. The device is not designed for vertical transfers and can tip or slide. Use the chair arms instead. This applies to walkers too.
Using a walker correctly
For a standard walker: lift it forward, set all four legs down at once, then step into the frame. Don't step past the walker's back legs. Keeping the frame directly in front creates a stable box of support.
For a wheeled walker or rollator: push it forward rather than lifting. Keep both hands on the handles. Using a small backpack or fanny pack to carry a phone or keys keeps both hands free and on the device.
Short coaching phrases that work:
- "Cane first, then weak leg, then strong leg."
- "Step into the walker, don't chase it."
- "Sit down using the chair arms, not the walker."
Pro Tip: Short, repeated supervised walks of 5–10 minutes build confidence faster than one long session. Practice in the rooms your parent uses most, not just a hallway.
Stairs, curbs, and uneven ground: the higher-risk moments
Stairs and transitions are where falls are most likely, even for people who use their device correctly on flat ground.
General stair rule: always use the handrail. If there is no handrail, your parent should not use those stairs alone.
- Going up: step up with the stronger leg first, then bring the cane and weaker leg up to meet it.
- Going down: move the cane or aid down first, then step down with the weaker leg, then bring the stronger leg down.
The phrase that helps: "Up with the good, down with the bad."
Walkers are not designed for stairs. If your parent uses a standard walker or rollator and needs to navigate stairs regularly, that's a conversation for a physical therapist. Some people transition to a cane for stairs only, but that requires training and should not be attempted without guidance.
For curbs and door thresholds:
- Approach straight on, not at an angle.
- Use a handrail when available.
- Pause and look before stepping.
Outdoor and uneven ground tips:
- Quad canes and walkers provide a wider base on uneven surfaces.
- Slow down significantly on grass, gravel, or wet pavement.
- In winter, rubber tips lose grip on ice. Attachable ice tips are available at most medical supply stores and are worth keeping on hand.
- Keep both hands on the device whenever the surface is unpredictable.
When to pause and ask for help: if your parent has vision problems, dizziness, or cognitive changes that affect judgment, stairs and outdoor surfaces should not be navigated alone. That's not a limitation to push through; it's a signal to reassess the situation with a clinician.
Pro Tip: A motion-sensor nightlight at the top and bottom of stairs reduces the risk of nighttime falls significantly. It takes about five minutes to install and costs very little.
Device checks that prevent the most common failures
Most mobility aid accidents are preventable. They come from worn tips, loose bolts, or a rollator brake that hasn't been tested in months.
Daily inspection checklist:
- Flip the cane or walker and check rubber tips for flat spots, cracks, or smooth wear.
- On a rollator, squeeze both brakes and confirm they hold firmly.
- Check that a folding walker is fully open and locked before use.
- Confirm no bolts or screws feel loose when you wiggle the frame.
- Check the seat on a rollator for tears or instability before your parent sits.
Cane-specific notes: quad cane tips must all make contact with the floor at once. If one foot is raised, the base is unstable. Check tip orientation each time.
Walker-specific notes: wheels on two-wheel and rollator walkers should swivel and roll smoothly. A wheel that drags or catches creates an uneven push and throws off balance.
Accessory warnings: baskets and trays attached to walkers are convenient, but overloading them shifts the center of gravity forward. Keep them light. A bag of groceries in a walker basket changes how the device handles.
The Ohio Department of Aging is direct on one point: never borrow or lend mobility aids. Fit and grip type are specific to the person. A device sized for someone else creates new strain and new risk.
Pro Tip: Keep a small ziplock bag with two spare rubber tips taped to the inside of a cabinet near the front door. When you spot wear, you can replace the tip on the spot without a pharmacy trip.
When should you replace tips, grips, or the whole device?
Maintenance doesn't need to be complicated. A simple rhythm of daily quick checks and a monthly deeper look catches most problems before they become hazards.
Daily quick check: rubber tips, brakes, loose parts (30 seconds).
Monthly deeper inspection:
- Check frame integrity: look for bends, cracks, or rust on metal frames.
- Test all wheels for smooth rotation and check for wobble.
- Tighten any screws or bolts that have loosened.
- Inspect grips for tears, stickiness, or compression that reduces control.
Replacement intervals:
- Rubber tips: MedlinePlus recommends inspecting tips daily and replacing them roughly every six months, or sooner if wear appears.
- Grips: replace when torn, compressed, or slippery.
- Wheels: replace when they wobble, drag, or no longer roll smoothly.
When to replace the whole device:
- The frame is bent or shows a crack near a joint.
- A weld has broken or looks stressed.
- The device has been in a fall and the frame alignment has shifted.
- Repeated repairs are needed to keep it functional.
A bent frame cannot be safely straightened at home. If the structure is compromised, the device needs to go.
Where to get replacement parts: local pharmacies like CVS or Walgreens carry standard rubber tips. Medical supply stores carry a wider range of parts and can often order specific components. The device manufacturer's website is worth checking for exact-fit replacements on rollators and specialty walkers.
Which home changes make the biggest difference?
The device is only part of the picture. Home hazards like loose rugs, cords, and poor lighting are common contributors to trips even when the device is used correctly.
The highest-impact fixes:
- Clear the primary walkway. Identify the path your parent uses most (bedroom to bathroom, kitchen to living room) and remove every rug, cord, and piece of furniture that narrows it below 36 inches.
- Secure or remove rugs. Loose rugs are one of the top tripping hazards for cane and walker users. Double-sided carpet tape or non-slip backing helps, but removing the rug entirely is safer.
- Improve lighting. Brighter bulbs in hallways and bathrooms, nightlights at floor level, and motion-sensor lights in the bathroom reduce nighttime fall risk. Research on lighting and fall prevention shows that adequate light levels are one of the most modifiable environmental risk factors for older adults.
- Address thresholds. Low-profile threshold ramps (available at hardware stores for under $20) smooth the transition between flooring types and reduce the catch risk for walker wheels.
Shoe advice: closed-toe, low-heel shoes with rubber soles are the right choice for walking with any mobility aid. Slippery slippers, socks without grips, and backless shoes all reduce the traction the device is designed to provide.
Pro Tip: The home safety guide on Helping-mom walks through low-cost fixes room by room, including the bathroom and kitchen where most falls happen.
Buy vs. rent, price ranges, and what Medicare may cover
Before you buy anything, check two things: how often your parent will use the device, and whether a doctor's prescription is in place.
| Device | Typical Price Range | Notes |
|---|---|---|
| Single-point cane | $15–$30 | Widely available; adjustable models recommended |
| Quad cane | $25–$60 | Larger base; confirm tip orientation at purchase |
| Standard walker | $30–$50 | Lightweight aluminum models are easiest to lift |
| Two-wheel walker | $40–$60 | Better for those who struggle to lift a standard walker |
| Rollator | $60–$150 | Brake quality and seat stability vary significantly by price |
Buying vs. renting: buying makes sense for long-term use. Renting is worth considering after surgery or a short recovery period when the need may be temporary. Many medical supply stores and some pharmacies offer short-term rentals.
Medicare coverage: Medicare Part B may cover walkers and canes as durable medical equipment when a doctor prescribes them as medically necessary. The process typically requires a written prescription and purchase from a Medicare-enrolled supplier. Coverage details vary, so confirm with your parent's doctor and their Medicare plan before purchasing.
Shopping tips:
- Choose adjustable models so height can be fine-tuned.
- Ask about the return policy before buying, especially for rollators.
- Local medical supply stores often allow you to try the device before purchasing, which is worth the extra trip.
When should you stop troubleshooting and call a PT or OT?
Some situations call for a professional, and recognizing them early saves time and prevents injury.
Red flags that mean call a clinician:
- Your parent has fallen two or more times in the past year, with or without the device.
- Their gait has changed noticeably (shuffling, leaning to one side, freezing).
- They report dizziness or unsteadiness that wasn't there before.
- They cannot use the device safely after several practice sessions.
- They have new pain in the wrist, shoulder, or hip when using the device.
A physical therapist (PT) or occupational therapist (OT) will do more than adjust the handle height. A PT/OT assessment includes gait analysis, custom fitting, and training on stairs and transfers, and these visits can meaningfully reduce fall risk and build confidence.
What to expect from the appointment: the therapist will watch your parent walk, assess posture and balance, adjust or recommend a different device, and walk through stairs and transfers in a controlled setting. Most sessions run 45–60 minutes. Follow-up visits focus on building confidence through short, structured practice.
Short, repeated practice sessions work better than one long training. Your parent doesn't need to master everything in one visit. Steady progress over several weeks is the realistic and healthy expectation.
Your caregiver checklist: daily, weekly, and on-visit steps
Print this or screenshot it. Use it during your next visit.
Daily checks (your parent can do these):
- Check rubber tips before the first walk of the day.
- On a rollator, test both brakes.
- Confirm the path to the bathroom is clear.
- Wear proper shoes before picking up the device.
- Keep a phone within reach at all times.
Weekly checks (you or your parent):
- Check all bolts and screws for looseness.
- Inspect frame alignment (no bends or shifts).
- Test wheel function on wheeled walkers.
- Confirm spare tips are on hand.
On-visit script (3-minute device check + 10-minute walk):
- Flip the device and check tips.
- Test brakes if applicable.
- Confirm handle height with the wrist-crease check.
- Walk with your parent through their most-used path.
- Watch for leaning, hesitation, or shuffling.
Coaching phrases that respect dignity:
- "Let's do a quick walk together."
- "Cane first, then step with the other foot."
- "Use the chair arms to sit, then set the walker aside."
- "Nice and steady, no rush."
Pro Tip: The elderly home safety checklist on Helping-mom is a free printable that covers device checks alongside bathroom, kitchen, and bedroom safety in one page.
Key Takeaways
Correct fit, consistent inspection, and a clear path are the three pillars of safe cane and walker use for older adults.
| Point | Details |
|---|---|
| Sizing rule | Handle at wrist crease; confirm 15–20° elbow bend before first use. |
| Correct cane side | Hold the cane on the stronger side, opposite the weak or injured leg. |
| Inspect tips regularly | Check rubber tips daily; replace approximately every six months or when wear appears. |
| Clear the path | Remove rugs, cords, and clutter from the primary walkway; aim for 36 inches of clear space. |
| Helping-mom resources | Helping-mom offers printable checklists, Zoom coaching sessions, and in-person home safety assessments to help you put these steps into practice. |
Small wins matter more than you think
There's a particular kind of worry that comes with watching a parent use a cane for the first time. You want it to go perfectly. It rarely does, and that's okay.
The caregivers who see the best results aren't the ones who run a perfect 10-minute training session. They're the ones who show up consistently, do a quick device check, walk alongside their parent for a few minutes, and notice small improvements over weeks. A longer walk without hesitation. Fewer pauses at the threshold. More confidence on the way to the kitchen.
Progress with mobility aids is genuinely incremental. A parent who was nervous about the walker in week one is often moving more freely by week four, not because of any single correction but because of repeated, low-pressure practice. Short sessions, calm coaching, and steady attention to the basics add up.
Keep a simple notebook near the device. Jot down the date, how far your parent walked, and anything you noticed. That record becomes useful when you talk to a doctor or PT, and it shows your parent that progress is real, even when it feels slow.
If something feels off, whether it's a new hesitation, a change in posture, or a fall that "almost happened," that's the moment to call a PT or OT. You don't need to wait for an actual fall. Early intervention is always easier than recovery.
How Helping-mom supports you through this
Knowing what to do and actually doing it during a short visit are two different things. Helping-mom is built for exactly that gap.
For caregivers who want a structured starting point, the home safety guide for seniors walks through the most common hazards room by room, with a printable checklist you can use on your next visit. If you want a more personalized review, a paid 1:1 Zoom session gives you 45–60 minutes with a caregiver specialist who will look at your specific situation, answer your questions, and help you build a realistic action plan.
For families in Central Florida, Helping-mom also offers in-person home safety assessments, where a specialist walks through the home with you and identifies the changes that will make the most difference for your parent's mobility and safety.
The next step is simple: start with the home safety checklist to see where the gaps are, then decide whether a Zoom session or in-person visit makes sense for your family.
Useful sources
The sizing and inspection guidance in this article draws from the following trusted sources:
- Mayo Clinic — How to use canes: backs the 15–20° elbow bend and wrist-crease sizing rule.
- Cleveland Clinic — How to use a cane: source for correct cane side, gait sequence, and the rule against using a device for sit-to-stand transfers.
- MedlinePlus — Using a cane: supports daily tip inspection and the six-month replacement guideline.
- OrthoInfo — Using mobility aids: environmental hazard guidance and home-safety recommendations.
- Medical News Today — Cane vs. walker: PT/OT assessment benefits and referral guidance.
- Mayo Clinic mobility aids guide: rollator brake training and hands-free carrying tips.
For printable checklists and caregiver tools, visit the Helping-mom resource hub.
FAQ
Is a cane or walker safer for most seniors?
A walker is generally safer for seniors with significant balance problems, weakness in both legs, or a recent fall history. A cane suits mild, one-sided balance or strength issues, provided the person has good overall coordination.
What are the most important safety rules when using a walker?
Keep both hands on the handles, step into the frame rather than past it, never use the walker to push up from a chair, and inspect the rubber tips and brakes before each use.
Why do some clinicians recommend against certain walkers?
Standard walkers without wheels require lifting, which can be difficult for people with limited upper-body strength or fatigue. Rollators require brake training and regular brake checks; without that training, the seat and wheels can create new fall risks rather than prevent them.
What is the safest walker for seniors?
The safest walker depends on the individual. A standard four-legged walker offers the most stability for people who can lift it. A rollator with locking brakes and a sturdy seat suits those who need to rest frequently, provided they receive proper brake training first.
When should a caregiver call a physical therapist about a mobility aid?
Call a PT or OT when your parent has fallen twice or more in a year, shows visible gait changes, reports dizziness when using the device, or cannot use the aid safely after several supervised practice sessions.