
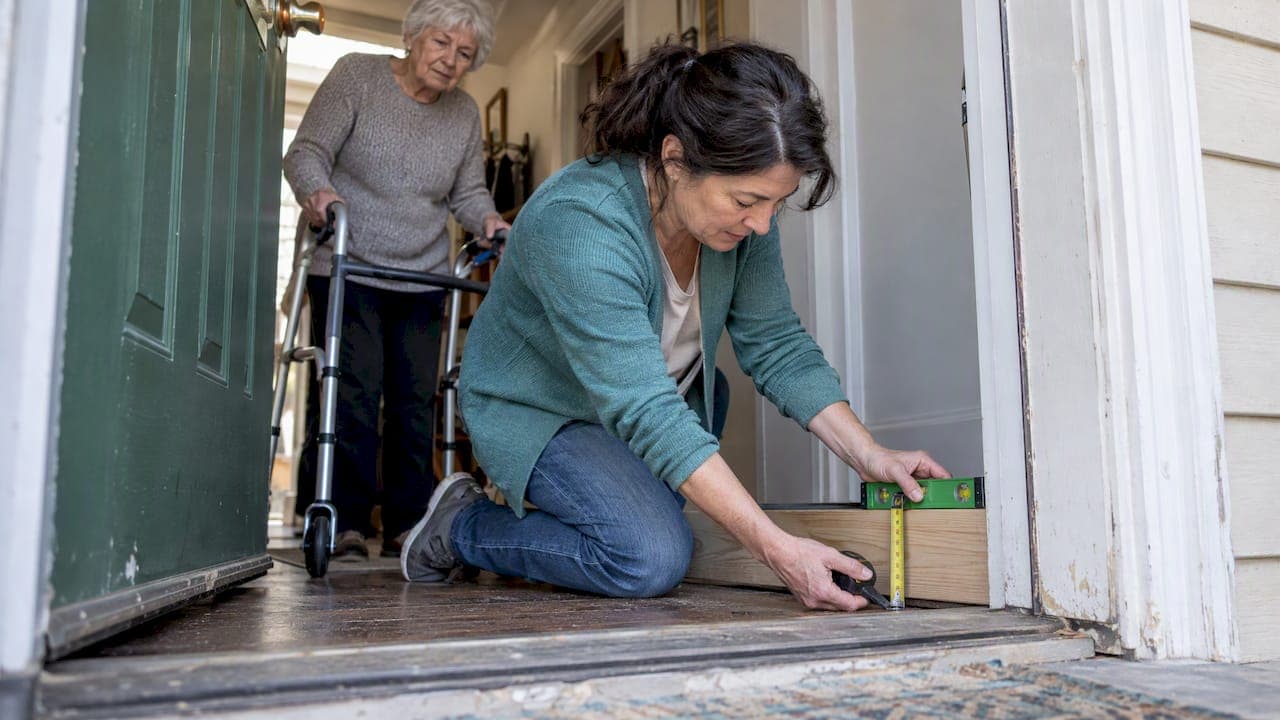
Measure the highest vertical rise at the door, because that one number decides how long your threshold ramp must be. The baseline accessibility slope is 1:12, meaning each inch of rise needs 12 inches of run, so a 2-inch rise calls for a 24-inch ramp. Small rises of ½ inch or less follow separate bevel rules. Use the measurement checklist below next.
TL;DR:
- Measure interior and exterior rise separately, then record the largest of three readings alongside clear width, door clearance, and available approach depth.
- A 1:16 or 1:20 slope needs more approach space but eases travel; reserve 1:10 slopes for limited alterations when space truly runs out.
- A ¼ inch change or less can remain untreated; changes up to ½ inch need a bevel no steeper than 1:2, and higher rises need ramps.
- Before buying, confirm the ramp fits between jambs, clears the full door swing, supports the person and mobility device, and has a grippy surface.
- Test the installed ramp with your parent’s usual mobility aid, and call a professional for multiple thresholds, a large rise, or landing or structural work.
Table of Contents
- What do you need to measure before choosing a ramp?
- How do you calculate the ramp length you need?
- What should you check before you buy or install?
- Which ramp types and materials suit a home threshold?
- What should you test once the ramp is in place?
- How do you decide, and when should you call a pro?
- What surfaces and materials keep a threshold ramp slip-resistant?
- What are your DIY threshold ramp options, and how do they compare?
- How do you choose a prefabricated threshold ramp for an aging parent?
- How do you keep a threshold ramp safe over time?
- A calm word from Mike on measuring with your parent
- FAQ
- Sources
What do you need to measure before choosing a ramp?
You need four numbers: the rise, the clear opening width, the door clearance, and the approach depth. Plan on one visit with a tape measure, a small level or straightedge, a notepad, and your phone camera. Bring your parent along if you can. Their walker or wheelchair is the real test of every number you write down.
- Vertical rise: Measure at the centerline of the doorway, from the interior floor to the top of the threshold, then from the exterior surface to the top of the threshold. Interior and exterior heights often differ, and exterior ground may sit lower, so measure both sides separately. Record the largest reading in inches.
- Clear opening width: Measure between the door jambs with the door open, then note the usable width a walker or wheelchair actually needs.
- Door swing and bottom clearance: Measure the gap between the bottom of the door and the floor at rest. Then swing the door through its full arc and watch where it travels.
- Approach depth: Measure the flat, horizontal space in front of the door where the ramp would lie. This is the room you have for the run.
Take three readings for each measurement and write down the largest rise. Sketch the doorway, label each number, and photograph the tape against the threshold. Those photos are gold when you compare products later or talk with a pro.
Pro Tip: Lay a straight board across the threshold, rest a small level on it, and measure from the board down to the floor. It catches sloping floors that a tape alone misses.
How do you calculate the ramp length you need?

Multiply the rise in inches by 12 for the baseline run. This 1:12 ratio is the standard accessibility slope, which works out to an 8.33% grade. A 2-inch rise needs at least 24 inches of run. A 3-inch rise needs 36 inches.
Gentler slopes feel easier, especially for someone who pushes a wheelchair or tires quickly. When you have the room, consider these options:
- 1:12 baseline: 1 inch of rise needs 12 inches of run, so a 2-inch rise needs 24 inches.
- 1:16 gentler slope: the same 2-inch rise needs 32 inches.
- 1:20 gentler slope: the same 2-inch rise needs 40 inches.
- Constrained-space allowance: Access Board guidance describes steeper slopes such as 1:10 for certain alterations. Treat this as a limited exception where space truly runs out, not a goal to aim for.
Here are two quick worked examples. Say your measured rise is 2 inches and you have 36 inches of approach depth. The 1:12 run is 24 inches and the 1:16 run is 32 inches. Both fit, so choose 1:16 for the easier slope. Now say the rise is 3 inches and you have only 36 inches. Only 1:12 fits, so that is your choice, and a steeper compromise is not worth the risk.
Rises over ½ inch must be ramped, and the running slope should stay uniform along the ramp. A ramp that starts gentle and ends steep defeats the purpose.
What should you check before you buy or install?
Fit matters as much as slope. A ramp with the perfect ratio can still scrape the door, leave a gap at the jamb, or catch a shoe. Run through these checks first.
- Door bottom clearance: Test the door through its full swing with the ramp profile held in place. Watch for dragging or a door that no longer latches.
- Bevel or ramp decision: A change in level of ¼ inch or less can stay untreated. Between ¼ and ½ inch, it should be beveled at no steeper than 1:2. Anything above ½ inch needs a true ramp.
- Fasteners and edges: Choose flush or countersunk fasteners. A proud screw head becomes a trip point.
- Width and landing: The product should sit snugly between the jambs with no gaps. Plan a level landing at the top and bottom so a walker has room to turn, as the Access Board describes for ramp runs.
- Exterior conditions: Look at slip resistance, where rainwater will run, and how the door sweep meets the ramp surface.
A practical threshold selection guide points to the same trio of measurements we covered earlier: height difference at the centerline, clear opening width, and door bottom clearance.
Pro Tip: Tape a cardboard mock-up to the threshold and swing the door. A quick test can save a return shipment.
Which ramp types and materials suit a home threshold?
The right material depends on the rise, how long the ramp will stay, and how much the doorway is used.
- Rubber thresholds: Best for small rises, often up to a couple of inches. They are flexible, easy to place, and handy for temporary or low-rise needs.
- Aluminum threshold ramps: Low-profile extruded pieces that can reach 1:12 slopes for larger rises. They hold up to heavier loads and years of use.
- Modular or portable ramps: Useful for visits, travel, or a short-term need after surgery. The trade-off is less permanence and sometimes less door clearance.
- Surface grip: Look for a textured, non-slip top, especially at an exterior door.
- Weight capacity and width: Check the rating against the parent's weight plus the device, and confirm the width fits the doorway.
- Permanent or temporary: A permanent fixture may need fasteners and sealing, while a temporary one needs a secure, non-slip footing and quick removal.
Your choice also shapes installation. Rubber often just sits in place or takes a few fasteners. Aluminum usually needs drilling and careful alignment. Upkeep differs too, which we cover in the maintenance section.
What should you test once the ramp is in place?
Treat the install as a test, not a finish line. Walk through these steps before you call it done.
- Confirm the slope and physical run match the length you calculated.
- Swing the door fully open and closed, and check that it latches and seals with the ramp in place.
- Run your hand along the edges and fasteners. They should be smooth and flush.
- Check the surface for slip resistance, wet and dry if it is outdoors.
- Have your parent try the ramp with the actual walker or wheelchair they use. Watch for rubbing, binding, or wobble.
- Note any small adjustments, and plan a professional visit if you see structural issues or several runs are needed.
Pro Tip: Stand a step behind your parent, not in front. You can steady them without crowding the path, and you see the wheels or feet exactly as the ramp does.
How do you decide, and when should you call a pro?
Three quick checks settle most decisions:
- Does the rise fit the run you have? Compare your calculated length against the approach depth.
- Do width and door clearance work? The ramp must fit the jambs and clear the door.
- Do surface and permanence suit the user? Match grip, weight rating, and temporary or permanent needs.
If you have several thresholds, a large rise, or landing and structural work, a professional visit is worth it. A quick next step is to measure, compare lengths, and test a board or temporary wedge at the door. When you would rather have an expert look, we offer in-home age-safe assessments and virtual home safety consultations. Our elderly home safety checklist pairs well with your measurements.
What surfaces and materials keep a threshold ramp slip-resistant?
Grip matters most when the ramp meets rain, wet shoes, or a walker's rubber tips. Look for a textured, non-slip surface, such as molded rubber ridges, grit-coated aluminum, or a gripping tread layer. Smooth metal or glossy finishes can turn slick fast, and grease or soap from the entryway makes it worse.
Veterans Affairs construction guidance for accessible entries stresses non-slip treatments, suitable materials, and proper landing dimensions. Those principles scale down well to a home threshold.
For indoor doorways, rubber is forgiving. It cushions edges, quiets wheel noise, and grips well on tile or hardwood. For exterior doors, aluminum with a gritted or ridged surface drains water and resists rust, though it can feel cold and slick if the grit wears away. Consider these details when choosing:
- Textured tops that stay grippy when wet
- Edges that taper smoothly into the floor without a lip
- Underside grip so the ramp does not slide on tile
- Colors that contrast with the floor, so low vision does not hide the edge
If your parent uses a cane or walker, test the tips on the surface before you commit. Rubber tips usually grip well on rubber, while metal tips can skid on slick coatings. A trial step on a sample or a store display tells you more than a product photo.
What are your DIY threshold ramp options, and how do they compare?
Many families start with a do-it-yourself ramp, and some options are perfectly reasonable for small rises. Here is how the common ones stack up.

Wooden wedge. A cut plywood or lumber wedge is cheap and can be sized to your exact rise. The downside is moisture. Untreated wood swells and rots outdoors, and a rough surface may need grip tape to avoid slipping. It works best indoors or under cover.
Rubber threshold pieces. Cut-to-fit rubber strips are easy, flexible, and forgiving. They suit small rises and temporary use. They are harder to stretch to a long run, so they often cannot reach a 1:12 slope on a larger step.
Foam or lightweight wedges. Light and cheap, but they can compress, shift, and wear down under a heavy walker or wheelchair. Treat them as a short-term fix.
Aluminum bar or angle. Home improvement stores sell metal pieces that can be trimmed. They hold up well, but sharp edges and exposed fasteners need attention.
The honest trade-off is that a homemade ramp is only as safe as its slope, edges, and grip. A wedge that looks right can still have a lip or a gap. If your measurements call for a long run, or the rise is above ½ inch, a prefabricated product built to a clear ratio is usually the calmer choice. We cover choosing one next.
How do you choose a prefabricated threshold ramp for an aging parent?
Start with your numbers from the checklist, then shop to fit them. Check that the listed rise range matches your measurement, and that the stated run reaches at least the 1:12 length you calculated. If a product listing does not state its slope or rise range, that is a sign to look elsewhere.
Match the width to the doorway between the jambs, and check the clear opening still works for a walker or wheelchair once the ramp is in place. Read the weight capacity, then add the person and the mobility device together. A rating that barely covers it leaves no margin.
Think about how your parent actually moves. Someone with a rollator needs a smooth transition with no lip. Someone with a cane may prefer a bit more texture. A wheelchair user needs the gentlest slope the space allows. Consider contrast color too, so the edge stands out against the floor.
Ask about installation. Some ramps just sit in place, which is easier for renters or temporary needs. Others fasten down for a permanent, quieter result. Look for flush or countersunk fasteners and edges that taper smoothly into the floor.
Finally, think about how things may change. A ramp that works for a cane today may need a gentler slope for a walker next year. If you are planning ahead, our guide to aging in place home modifications can help you see where a threshold ramp fits among other changes.
How do you keep a threshold ramp safe over time?
A ramp is not a set-and-forget fixture. A quick check every month or two keeps small problems from becoming trips.
- Clean the surface: Sweep away grit, leaves, and dirt. Wash off soap, oil, or algae that make it slick.
- Check the grip: Rubber tread can wear smooth, and grit coatings can wear off. Replace or recoat when the surface feels slippery.
- Test the fasteners: Make sure screws stay flush and tight. A loose or raised head is a trip point.
- Look at the edges: Cracks, curling corners, or gaps at the floor line are warning signs.
- Watch the door: If the door starts rubbing or latching differently, something has shifted.
- Check for movement: A ramp that slides, rocks, or lifts needs fresh adhesive, new fasteners, or replacement.
After a hard winter or a heavy storm, give the ramp an extra look, since freezing and heavy rain loosen things. If your parent mentions the ramp feels different, take it seriously and recheck it with them walking through. Their sense of the surface is often the earliest warning. Our home entry safety fixes can help you cover the rest of the entry too.
A calm word from Mike on measuring with your parent
I've learned that careful measuring and a real-life test protect dignity as much as safety. A ramp that fits well means your mom or dad stops thinking about the doorway at all, and that is the goal. Bring them into it. Ask them to use their usual walker or cane during the test, and listen when they say something feels off. Their feedback beats any chart. When you would like another set of eyes, we offer virtual consultations and in-home assessments as a gentle next step. You do not have to figure out every threshold on your own, and a calm plan beats a rushed purchase every time.
— Mike C.
FAQ
What is the standard ramp ratio?
The standard accessibility ratio is 1:12, meaning 1 inch of rise needs 12 inches of run. That works out to an 8.33% grade. Gentler slopes such as 1:16 or 1:20 feel easier when you have the space.
How do you measure for a threshold ramp?
Measure the vertical rise at the centerline on both the interior and exterior sides, and record the larger number in inches. Then measure the clear opening width, the door bottom clearance, and the flat approach depth in front of the door. Take three readings and photograph them.
What is a rubber threshold ramp?
A rubber threshold ramp is a flexible, molded piece that smooths a small change in level at a doorway. It suits low rises and temporary needs, and it is easy to place and trim. Larger rises usually call for a longer aluminum or modular ramp.
What is the difference between a step ramp and a threshold ramp?
A threshold ramp covers the small lip at a doorway, usually a few inches at most. A step ramp spans a full step or several, so it is much longer and often needs landings. The rise you measured tells you which one you need.
When does a threshold need a ramp instead of a bevel?
A change of ¼ inch or less can stay as is. A change between ¼ and ½ inch should be beveled, and anything over ½ inch needs a true ramp, according to the Access Board.